
Internal tools rarely die of technical difficulty. They die in a backlog. A shipping-cost calculator, an intake form, a small dashboard over a spreadsheet — each one is trivial to write and expensive to deliver, because delivery means a repository, a build pipeline, an authentication integration, a hosting decision, a certificate, DNS, and someone on call afterwards. This guide shows you how to build the alternative: a deployment service where a person describes the tool they want and receives a running, single-sign-on-protected web application, with no Git, terminal, or DevOps step in between.
The pattern comes from a production system built by PDI Technologies and documented by AWS. PDI serves convenience retail and petroleum wholesale, and the company reports roughly 4,000 employees serving more than 200,000 customer locations in over 200 countries, which is the scale that made a self-service tool factory worth building in the first place (AWS Machine Learning Blog). You do not need that scale to use the design. You need a place where small tools queue up forever.
Everything below follows the architecture AWS published. Where a number, capability, or limit appears, the source is linked in the same paragraph, so you can check it before you commit engineering time.
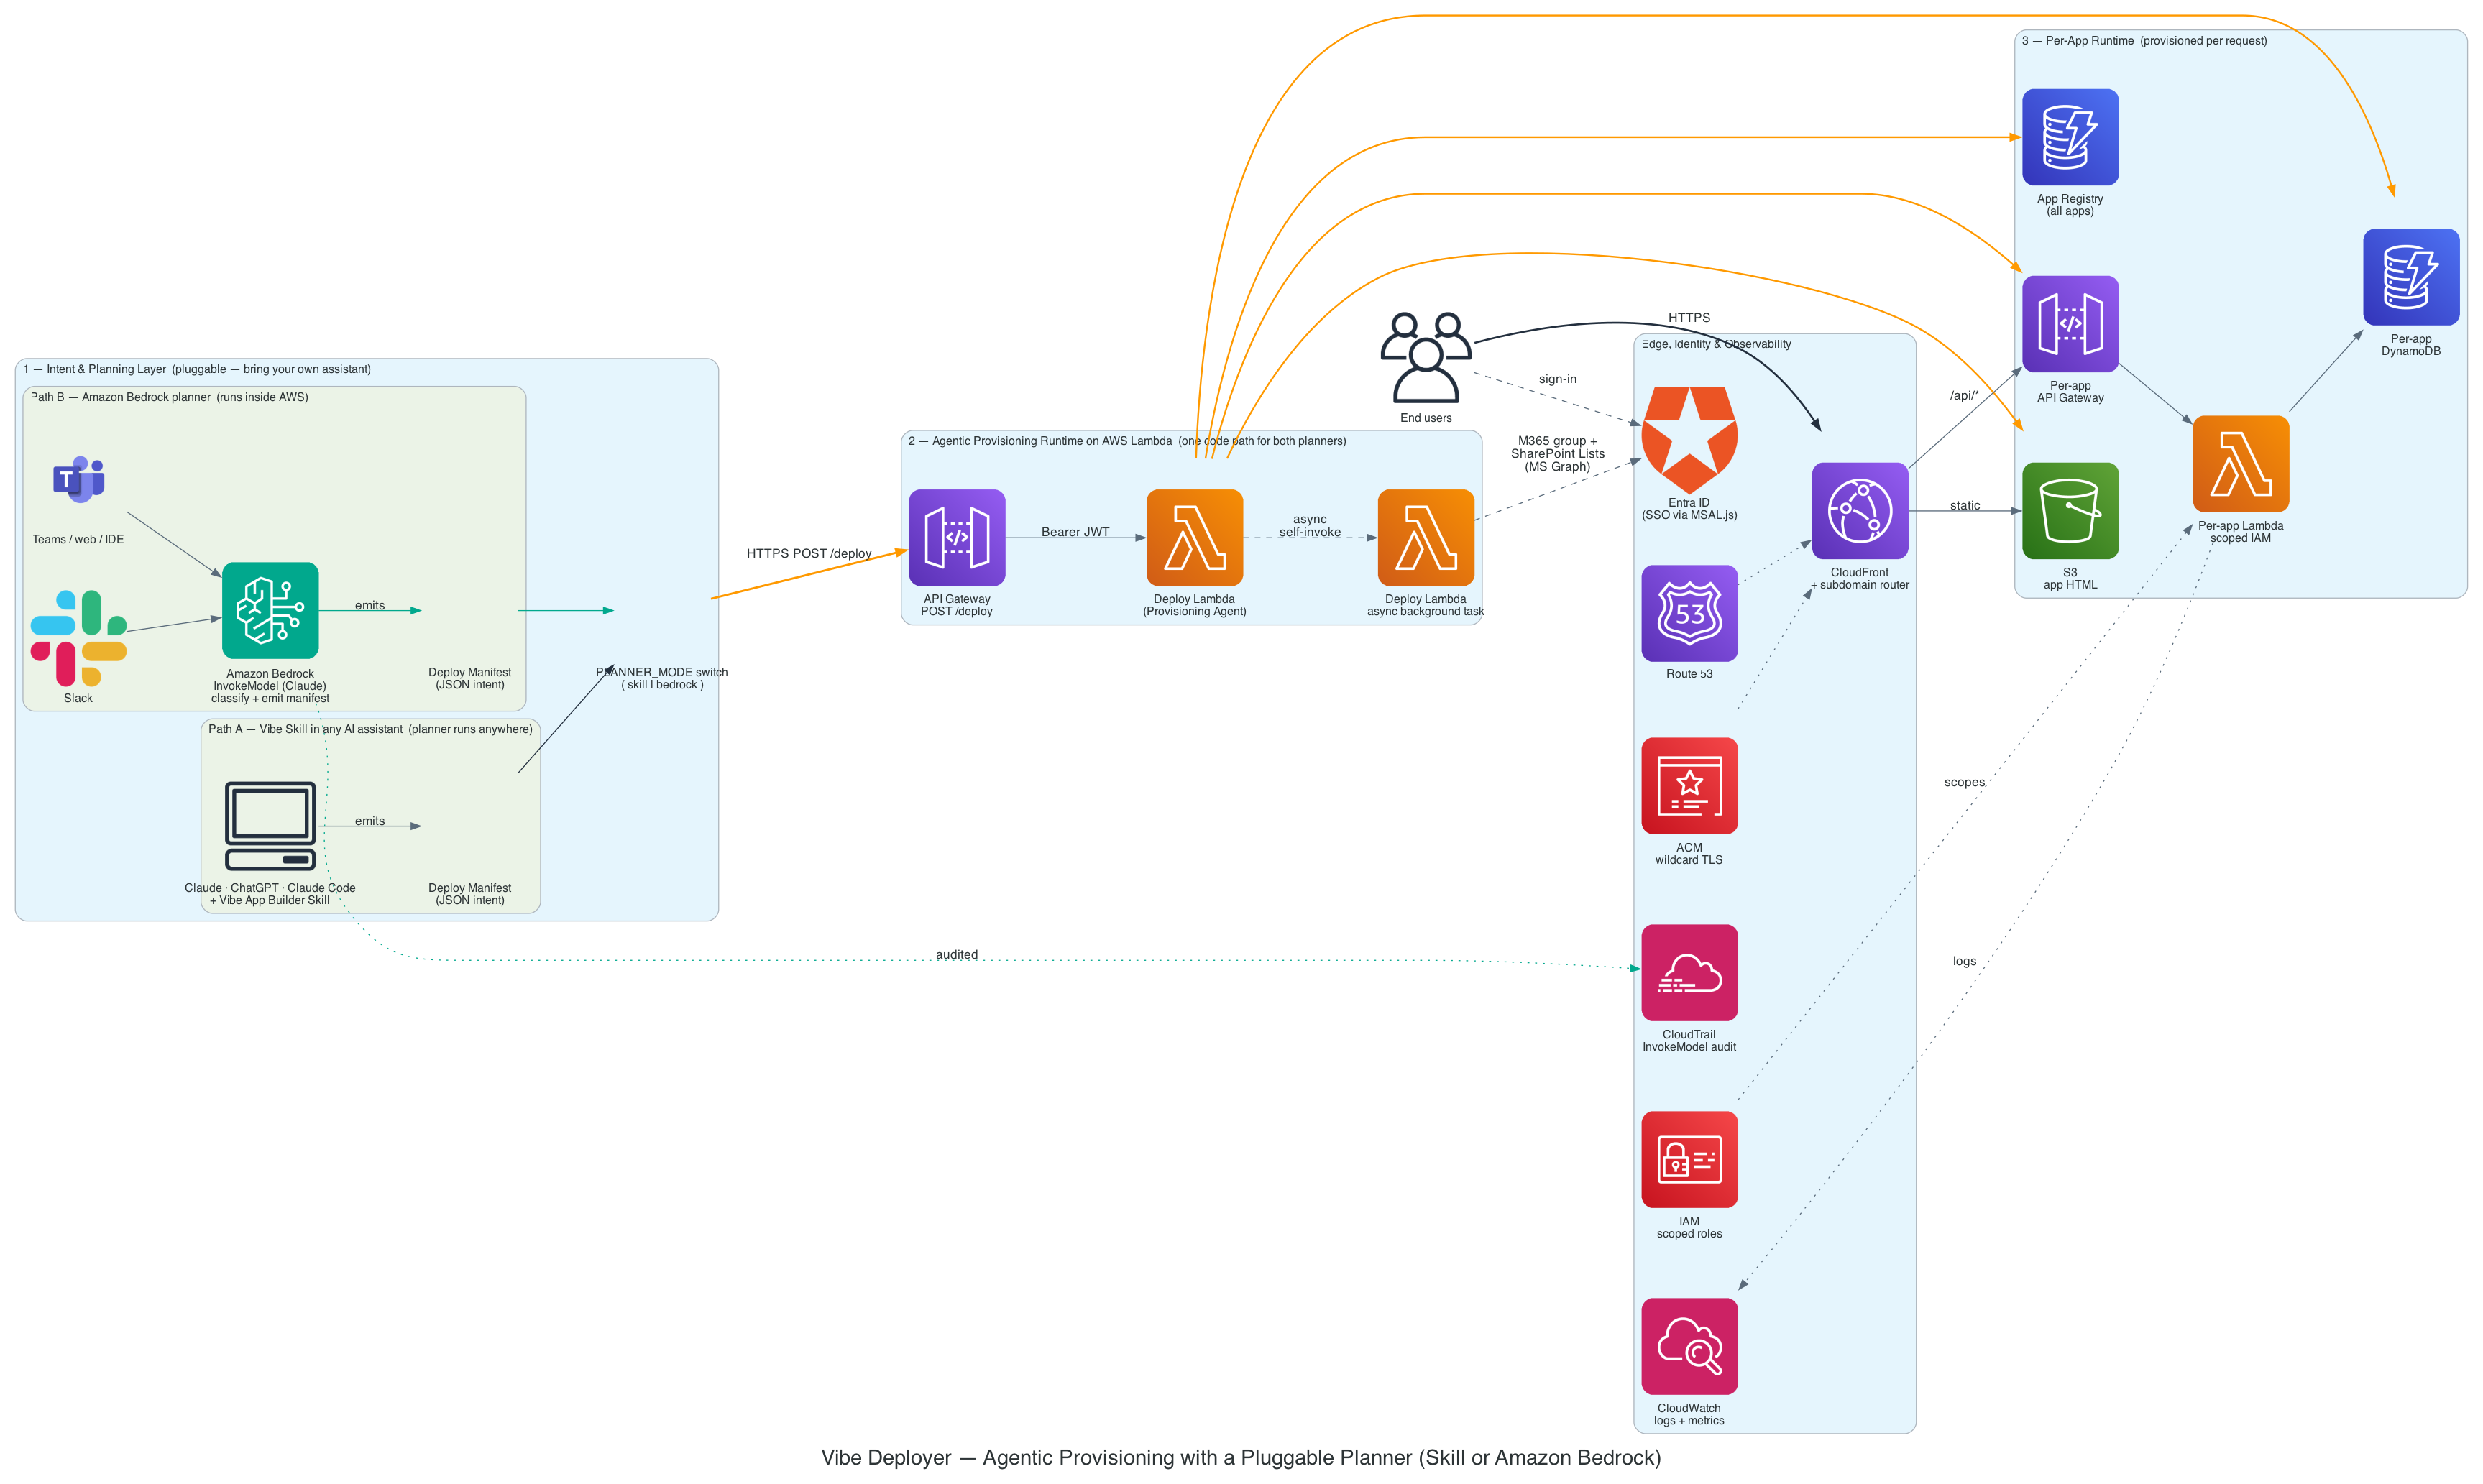
Source: AWS Machine Learning Blog — Building an agentic app deployer with Amazon Bedrock and AWS Lambda
Before you start
Be honest about the prerequisites, because this is infrastructure that creates infrastructure. You should be comfortable with AWS Lambda, Amazon API Gateway, Amazon DynamoDB, Amazon S3, Amazon CloudFront, and Amazon Bedrock, and you need AWS CLI credentials permitted to create IAM roles and policies, since the provisioning agent mints roles at runtime. Microsoft Entra ID and MSAL.js experience matters for the authentication layer; the published design uses Entra as its identity provider (AWS Machine Learning Blog).
Decide your four non-negotiables first. The published system committed to four: intent in and application out with no engineering handoff; security and governance inherited by default rather than opted into; serverless and scale-to-zero so hundreds of idle apps cost close to nothing; and generative AI available only through a controlled path with guardrails, quotas, and an audit trail (AWS Machine Learning Blog). Write your own list before step one. It is the thing that stops the project from drifting into a general-purpose PaaS.
Step 1: Split the agent in two
The single most useful decision in this design is refusing to build one agent. An agent here means a system that takes a goal, breaks it down, picks tools, and acts — and none of that requires a language model in the request path for every decision.
So build two agents with different trust profiles:
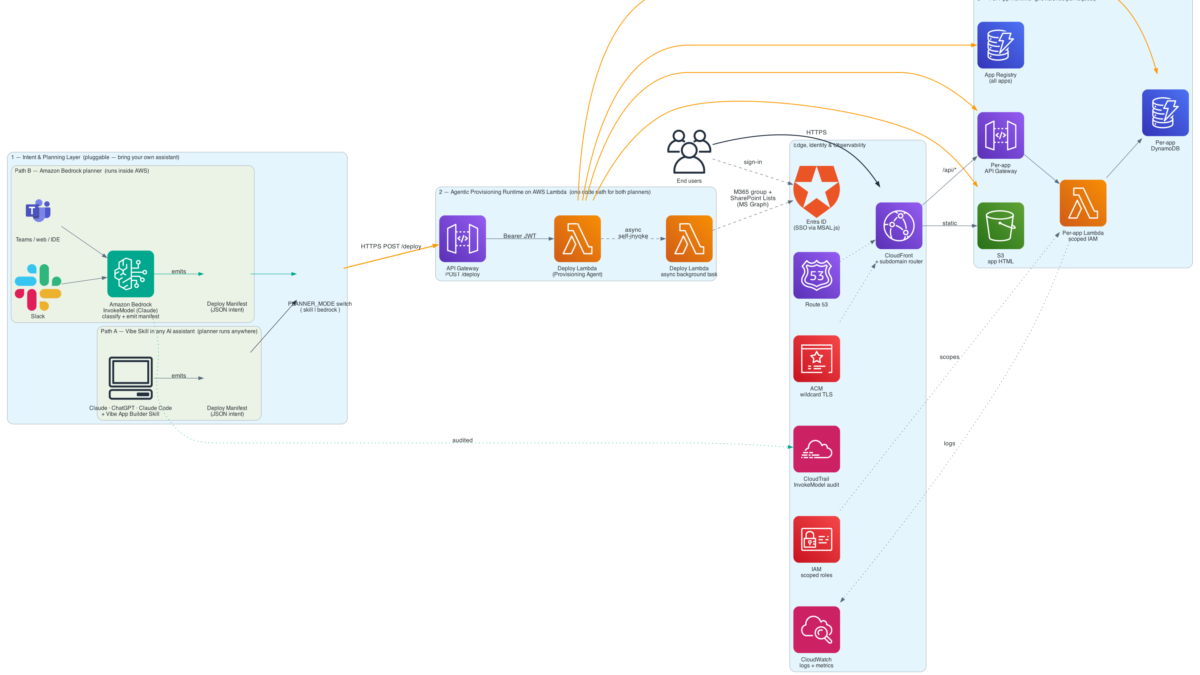
- The planning agent talks to the human. It interviews the requester, refines the idea, generates the front end, and emits a structured deploy manifest: JSON carrying the app name, type, data schema, and access-control settings.
- The provisioning agent never talks to a human. It is an AWS Lambda function that consumes the manifest and performs deterministic, logged, tool-using orchestration against AWS and Microsoft Graph APIs.
Keep the language model on the intent side. Provisioning is precisely the workload where every decision must be reproducible, auditable, and free of hallucination, which is why the published design places it in Lambda rather than in a chat session (AWS Machine Learning Blog).
Step 2: Define the manifest contract before writing code
The manifest is the seam that makes everything else replaceable. Specify it first: app name and slug, app type, the data schema when persistence is required, and the access-control mode. Treat it as a versioned API, validated on arrival, rejected loudly when malformed.
Once the contract exists, the planner becomes a swappable component rather than a dependency. That is the property to protect through the rest of the build.
Step 3: Make the planner pluggable with one environment variable
Intent arrives from wherever your colleagues already work, so support two interchangeable paths selected by a single PLANNER_MODE variable, with both emitting an identical manifest.
Path A — planning inside an existing AI assistant. Package the planning logic as a skill that runs inside whatever assistant employees already have open. The assistant conducts the interview, generates the front end, and returns the manifest. The conversational experience is rich and the AWS-side surface area stays small (AWS Machine Learning Blog).
Path B — planning inside your AWS boundary. For Teams, a web form, Slack, or an IDE, route the request to Amazon Bedrock and let an InvokeModel call act as the planner: classify the workload, emit the manifest, and validate or repair the schema before provisioning. Every decision lands in AWS CloudTrail tied to a model-invocation ID, and intent data never leaves the AWS boundary — the deciding factor for teams with data-residency obligations (AWS Machine Learning Blog). Bedrock’s own documentation is the place to pick the underlying model, since it exposes hundreds of foundation models that can be swapped without rewriting application code (Amazon Bedrock — Models at a glance).
Pin PLANNER_MODE per organization, workspace, or user. One business unit can be required to use the in-boundary path while another keeps the assistant experience, and neither choice touches downstream code.

Source: AWS Machine Learning Blog — Building an agentic app deployer with Amazon Bedrock and AWS Lambda
Step 4: Put one authenticated door in front of the agent
Both planner paths post the manifest over HTTPS to a single POST /deploy route on Amazon API Gateway, authenticated with an Entra ID bearer token issued through MSAL.js. One endpoint, one contract; from here the flow is identical no matter who planned it (AWS Machine Learning Blog).
The Deploy Lambda’s first job is refusal, not creation. Validate the Entra JWT for tenant and expiry, require an access-control mode to be present, and check slug ownership atomically in the app registry table so two requests cannot claim the same subdomain. Do this before a single resource is created.
Step 5: Classify the workload and choose a provisioning path
Give the agent a tool belt — the AWS SDK for JavaScript v3 plus the Microsoft Graph API — and have it decide which tools to call, in what order, from the manifest. The classification is deterministic, so the same manifest always yields the same plan (AWS Machine Learning Blog).
Two paths cover most requests:
- Static app (a calculator, a chart): wrap the generated HTML in an Entra authentication shell, upload it to Amazon S3, invalidate the CloudFront cache, and register the app in DynamoDB.
- Full-stack app (needs persistence): additionally provision a per-app DynamoDB table, a per-app Lambda with a scoped IAM role, and a per-app API Gateway, then inject the new API URL into the front end before wrapping and uploading it.
Resist a third path until the first two are boring.
Step 6: Handle slow steps with asynchronous self-invocation
Some provisioning work outlasts a user’s patience — directory propagation after creating a Microsoft 365 group is the classic offender. Rather than hold the request open, the agent calls lambda:InvokeFunction on itself with an Event invocation type, returns the live URL immediately, and lets the background copy finish the slow part (AWS Machine Learning Blog).
This is the serverless version of an agent’s background task, and it stays inside the Lambda execution envelope. Make the background copy idempotent; retries are a matter of when, not if.
Step 7: Default to shared compute, graduate only on evidence
Most full-stack apps are plain create, read, update, and delete operations over their own table, so run them on a shared, platform-managed CRUD Lambda behind a weighted alias with provisioned concurrency — one warm, audited code path serving many apps, with automatic canary rollback (AWS Machine Learning Blog).
An app earns its own Lambda and dedicated scoped role only when its manifest declares a capability from a closed allowlist — sending email, calling one named external HTTPS domain, reading a designated data source — and that graduation requires admin approval backed by static analysis of the submitted code plus drift detection on the resulting IAM role (AWS Machine Learning Blog). Cheap and shared by default; privileged and gated by exception.
Step 8: Route requests at the edge
Serve every app over HTTPS through CloudFront, with a CloudFront Function mapping <slug>.domain to the right object in S3, and put Entra single sign-on in front of all of it. CloudFront Functions is the correct tool for this specific job: AWS documents submillisecond startup times and immediate scaling to millions of requests per second for lightweight JavaScript that manipulates requests and responses at the edge (Customize at the edge with CloudFront Functions). Keep routing logic there and keep it small — build, test, and deploy the function inside CloudFront itself (Customize at the edge with CloudFront Functions).
Step 9: Make in-app AI a platform capability, not an app dependency
Every deployed app eventually wants to summarize a record or classify a form. The tempting path — each app embedding a vendor SDK and its own key — scatters credentials, defeats central governance, and makes spend uncontrollable. Expose one AI endpoint instead, with three controls on every call (AWS Machine Learning Blog):
- A mandatory Amazon Bedrock Guardrail performing PII redaction, content filtering, and prompt-injection defense on every invocation, which the app cannot disable.
- An atomic budget across 12 counters. Before any Bedrock call, one DynamoDB
TransactWriteItemsreserves spend across four scopes — global, app, user, and app-user — over three windows each: daily, weekly, and monthly. A breach in any of the twelve short-circuits the request with429 Too Many Requestsand a structured body naming the limit that fired, turning runaway cost into a bounded, observable event rather than a surprise invoice (AWS Machine Learning Blog). - A two-tier terminate switch, where an admin disable always beats an owner enable and one platform-wide flag can switch AI off everywhere (AWS Machine Learning Blog).
Admins may raise app-scoped budgets; owners cannot widen the global or per-user ceilings. Audit every call with user principal name, app, model, token counts, estimated cost, and guardrail outcome, so spend is attributable end to end (AWS Machine Learning Blog).
Step 10: Enforce least privilege in the layer that can hurt you
The agent holds broad permissions because creating infrastructure requires them. The apps it creates must not inherit that. Give per-app Lambda functions a separate scoped role reaching only DynamoDB tables under a fixed prefix such as pdi-brew-{env}-app-, so a bug in one tenant’s code cannot read another tenant’s data (AWS Machine Learning Blog).
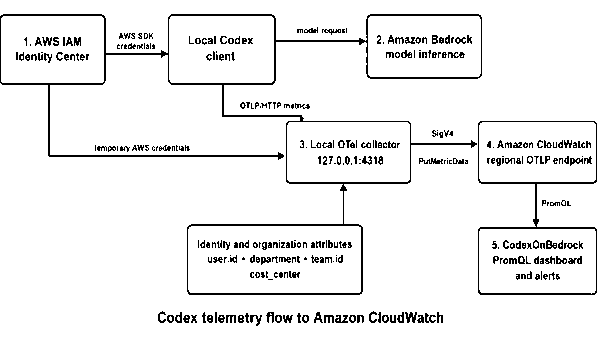
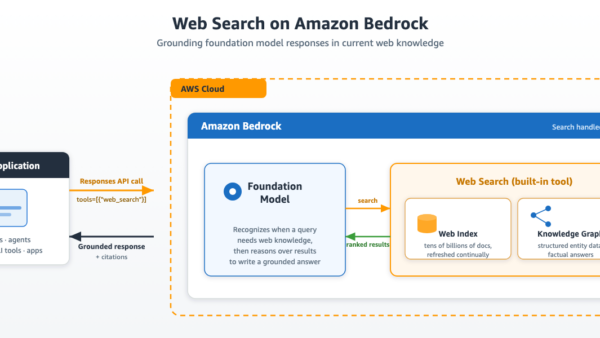
Then make the blast radius observable. Every app should surface in Amazon CloudWatch by default, and if you are running Bedrock behind the platform you will want the same instrumentation discipline described in our guide to monitoring Codex usage on Amazon Bedrock with CloudWatch. If your in-app AI needs current external facts rather than only the app’s own data, the configuration steps in our walkthrough on enabling web search grounding on Amazon Bedrock belong in the same governed endpoint rather than in individual apps.
A build order that works
Ship it in this sequence and each stage is independently useful:
- Write the manifest schema and a validator.
- Stand up API Gateway plus the Deploy Lambda that only validates and refuses.
- Add the static-app path end to end: S3, CloudFront invalidation, registry write.
- Add CloudFront Function subdomain routing and the Entra authentication shell.
- Add the full-stack path with the shared CRUD Lambda.
- Add asynchronous self-invocation for group creation.
- Add the governed AI endpoint with the guardrail and budget counters.
- Add capability graduation, static analysis, and IAM drift detection last.
How to tell whether it worked
The success test is not that the deployment succeeds. It is that a non-technical colleague ships a tool without asking anyone for permission, and that you can still answer three questions afterwards: which identity created it, exactly which resources exist because of it, and what it costs. If provisioning is deterministic and logged, and AI access is metered and guardrailed, those answers are available on demand.
Do not skip the refusal logic to demo faster. A system that creates cloud resources from natural language is only responsible when its first instinct is to say no — to an unvalidated token, a missing access-control mode, a taken slug, an undeclared capability, or a budget that is already spent.